


Using the Silhouette Cameo for Custom Vinyl Decals
Unlock your creativity with the Silhouette Cameo! This versatile machine allows you to craft stunning vinyl decals that add a personal touch to any space. Whether you're decorating mugs, walls, or gifts, the possibilities are endless—let your imagination soar!
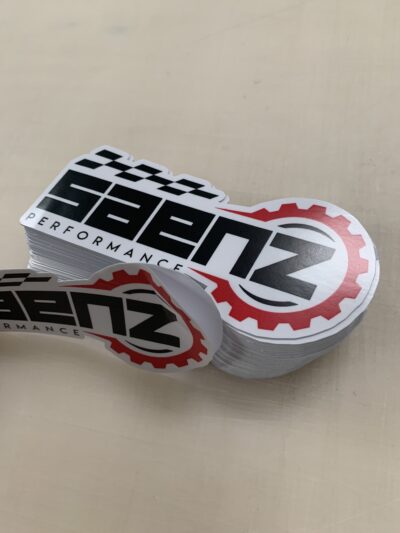
Are you ready to unleash your creativity and transform everyday objects into personalized treasures? If so, you’re in for a treat! The Silhouette cameo is more than just a cutting machine; it’s your ticket to a world of custom vinyl decals that can turn mundane items into vibrant expressions of your personality. Whether you’re looking to add a touch of charm to your home decor, create eye-catching gifts, or simply indulge your crafty side, this astonishing tool opens the door to endless possibilities. In this article, we’ll dive into the ins and outs of using the Silhouette Cameo for vinyl decals, offering helpful tips and inspiring ideas that will have you crafting like a pro in no time. So grab your cutting mat and roll of vinyl—let’s get started on this fun and creative journey together!
Looking to buy a Silhoette Cameo? Click here.
Getting Started with Your Silhouette Cameo for Vinyl Decals
Starting your journey with the Silhouette Cameo is like unlocking a new world of creativity, especially when it comes to crafting your own vinyl decals. The first step is to ensure you have the right materials ready. Gather high-quality vinyl sheets, a cutting mat, and the necessary transfer tape. Once you have your supplies, hook up your Cameo with a USB connection or Bluetooth for a wireless experience. To prepare, open the Silhouette studio software and familiarize yourself with the design tools available. You can either create your own designs or import SVG files, which are perfect for decals!
Next, it’s time to unleash your creativity. You can start with simple shapes or text, gradually moving towards more intricate designs as you gain confidence. When your design is ready, configure the settings for cutting, ensuring you’re using the appropriate blade depth and speed for vinyl. As a tip, always conduct a test cut on a scrap piece of vinyl to fine-tune your settings. Once your decals are cut, use a weeding tool to remove excess vinyl, making your design pop before applying transfer tape. With these steps, you’re all set to embellish everything from mugs to walls with your unique creations!
Choosing the Right Vinyl: A Guide for Every Project
When diving into the world of vinyl crafting with the Silhouette Cameo, the selection of the right type of vinyl can make all the difference in achieving professional-looking custom decals. Adhesive vinyl is a versatile choice great for indoor projects, while outdoor vinyl offers the durability needed for items exposed to the elements. If your focus is on fabric, consider heat transfer vinyl, which seamlessly adheres to materials like t-shirts and tote bags. Each option has its unique attributes, and a clear understanding of your project’s requirements will guide you in making the best choice.
To further streamline your decision, here’s a handy comparison of the various vinyl options:
| Type of Vinyl | Best For | Durability |
|---|---|---|
| Adhesive Vinyl | Windows, signs, decals | 3-5 years indoors, 1-3 years outdoors |
| Outdoor Vinyl | Car decals, outdoor signage | 5-7 years |
| Heat Transfer Vinyl | Apparel, fabric crafts | up to 50 washes |
With this information, you’re set to select the perfect vinyl for your next project. Remember, experimenting with different finishes—like glossy or matte—and colors can elevate your work and make each piece truly one-of-a-kind!
Looking to buy a Silhoette Cameo? Click here.
Mastering Design Software: Tips for Creating Stunning Decals
to truly unlock the potential of the silhouette Cameo for crafting eye-catching vinyl decals, it’s essential to familiarize yourself with the software’s robust features. Start by mastering the basics of vector graphics—these scalable designs ensure your decals maintain clarity no matter the size. spend time exploring the software’s built-in libraries for inspiration, and don’t hesitate to utilize the following tools to enhance your design:
- Pen Tool: Perfect for creating custom shapes and intricate designs.
- Text Tool: Experiment with fonts and text styles for personalized touches.
- Shape Builder: Combine multiple shapes into one cohesive design.
- Layering: Use layers effectively for complex, multi-colored decals.
Once you feel comfortable with the software, it’s time to refine your designs for a polished finish. Pay attention to details like color contrast, which can make or break the visibility of your decal. Don’t forget to test different cut settings on scrap vinyl to find the perfect settings for your material. Here’s a simple guide to help you decide on cut depth based on vinyl type:
| vinyl Type | Recommended Cut Depth |
|---|---|
| Standard vinyl | 3-4 |
| Transfer tape | 2-3 |
| Heat Transfer Vinyl | 5-6 |
Cutting Techniques That Ensure Perfect Results
When working with the Silhouette Cameo, mastering various cutting techniques is essential to achieve the most professional-looking vinyl decals. start with proper material alignment on the cutting mat to ensure accuracy. A few essential tips to keep in mind include:
- Adjust blade depth according to the thickness of your vinyl. A deeper cut is frequently enough required for thicker materials.
- set the correct speed and force in your cameo settings. Lower speeds can enhance precision, while adequate force penetrates the material without tearing.
- test cuts are vital. Always run a small test before beginning a large project to confirm settings are on point.
Another crucial aspect is weeding, which refers to the removal of excess vinyl after cutting. this step determines the decal’s cleanliness and professionalism. Consider these weeding strategies:
| Weeding Tips | Description |
|---|---|
| Use a weeding tool | A fine-point tool helps lift intricate designs without damaging them. |
| Work from one corner | Start in a corner and gently pull back the vinyl, allowing the remaining design to stay intact. |
| Take your time | Pace yourself during weeding to ensure all details remain intact and properly separated. |
Weeding Made Easy: Tricks for Hassle-Free Vinyl Removal
Weeding vinyl can often feel like a tedious task, but with the right techniques, it can be streamlined. Consider starting with the right tools to make the process as smooth as possible. A weeding tool with a precision tip will allow you to easily pick up small pieces of vinyl, while a pair of tweezers can be invaluable for removing those stubborn bits. You can also enhance your workflow by utilizing a light box to illuminate your design, making it easier to see where the unwanted vinyl resides. Here are some tricks to help you breeze through the weeding process:
- Use transfer tape: It can help lift away the vinyl, making it easier to weed the excess parts.
- Cut the material upside down: This gives you a better overview of your design and where to weed.
- Try a cut setting for weeding: Adjust the blade depth and pressure to make weeding easier without damaging your design.
Another helpful tip is to keep your workspace organized. A simple tool organizer can hold your weeding tools and keep them easily accessible. Additionally, having a dedicated area where you can lay down your vinyl sheets will prevent them from curling or getting contaminated. If you’re dealing with intricate designs, remember to weed on an adhesive surface, which can help hold the vinyl in place while you work. Maintaining a steady hand and taking your time are essential; rushing can lead to mistakes. Here’s a quick reference table of vinyl types and their weeding difficulty:
| Vinyl Type | Weeding Difficulty | Recommended Tools |
|---|---|---|
| Permanent Vinyl | Moderate | Weeding Tool, tweezers |
| Heat Transfer Vinyl (HTV) | Easy | Weeding Tool, Scissors |
| Removable Vinyl | Easy | Weeding Tool |
Application Methods: How to Transfer Your Decals Like a Pro
Transferring your decals correctly can make the difference between a professional-looking project and a DIY disaster. To achieve that flawless finish, start by gathering the right tools, which typically include a transfer tape, a squeegee, and a pair of scissors. ensure your surface is clean and dust-free to enhance adhesion. Begin by cutting the transfer tape slightly larger than your decal, then peel and lay the tape over your design. Use your squeegee to apply even pressure, smoothing out any air bubbles to ensure full contact before peeling away the backing paper. The goal is to have your decal adhere firmly to the transfer tape.
Once your decal is securely on the transfer tape, it’s time to position it on your chosen surface. A helpful tip is to use a level or a measuring tape for precise placement. Gently align the design and once satisfied, apply a firm pressure using the squeegee to attach the decal to the surface. Start from the center and work your way out to avoid any wrinkles or bubbles. After it’s firmly stuck, slowly peel away the transfer tape at a 45-degree angle to reveal your stunning new decal. if any areas lift, just press them down and repeat the peeling process. Voilà! You’ve successfully transferred your custom vinyl decal like a pro.
Caring for Your Vinyl Decals to Keep Them Looking Fresh
To ensure your vinyl decals maintain their vibrant appearance, it’s essential to adopt a regular care routine. Start by keeping them clean and free of dust, as dirt can dull their brightness over time. A simple wash with a mild soap and water solution works wonders. Just use a soft cloth or sponge to gently wipe the surface, avoiding any abrasive materials that might scratch or damage the vinyl. It’s best to steer clear of harsh chemicals or solvents, which can degrade the adhesive and reduce the decal’s lifespan. Once cleaned, dry the decals thoroughly to prevent moisture buildup.
Additionally, protecting your decals from direct sunlight can prevent fading. If possible, apply your decals in areas that are shaded or use a UV protective sealant to shield them. When it comes to storage, keep them flat and away from extreme temperatures or humidity, as these factors can warp or weaken the material. For your convenience, here’s a quick reference table summarizing the best practices for maintaining your vinyl decals:
| Care Tips | What to Do |
|---|---|
| Cleaning | Use mild soap and soft cloth. |
| Shelf Life | Keep decals flat in a cool, dry place. |
| Sun Protection | Avoid direct sunlight or use UV sealants. |
In Summary
As we wrap up our journey through the colorful world of custom vinyl decals with the Silhouette Cameo, we hope you’re feeling inspired and ready to unleash your creativity! Whether you’re crafting unique gifts, personalizing your space, or simply indulging in a fun project, this versatile machine is your ticket to endless possibilities.
Remember, every great project starts with a spark of imagination. So gather your supplies, fire up that cameo, and let your creativity flow! Don’t hesitate to experiment with different designs, colors, and materials—your only limit is your imagination.
We’d love to hear about your adventures in vinyl crafting! Share your triumphs, tips, and even the occasional mishap with fellow crafters in the community. Happy crafting, and may your decals be ever vibrant and full of life! ✨
Looking to buy a Silhoette Cameo? Click here.
