A folded brochure can look sharp on screen and still develop a pale, ragged line down its cover. Before changing the artwork or choosing a heavier stock, check how the paper, print and fold will work together. For cards, menus and brochure covers, the useful starting point is to align the fold line with the paper grain, agree on suitable creasing, and approve a finished sample.
Make those decisions before the printer orders paper or arranges multiple copies on a press sheet. Once the job is printed, the available fixes become more limited.
Understand grain direction before choosing the sheet
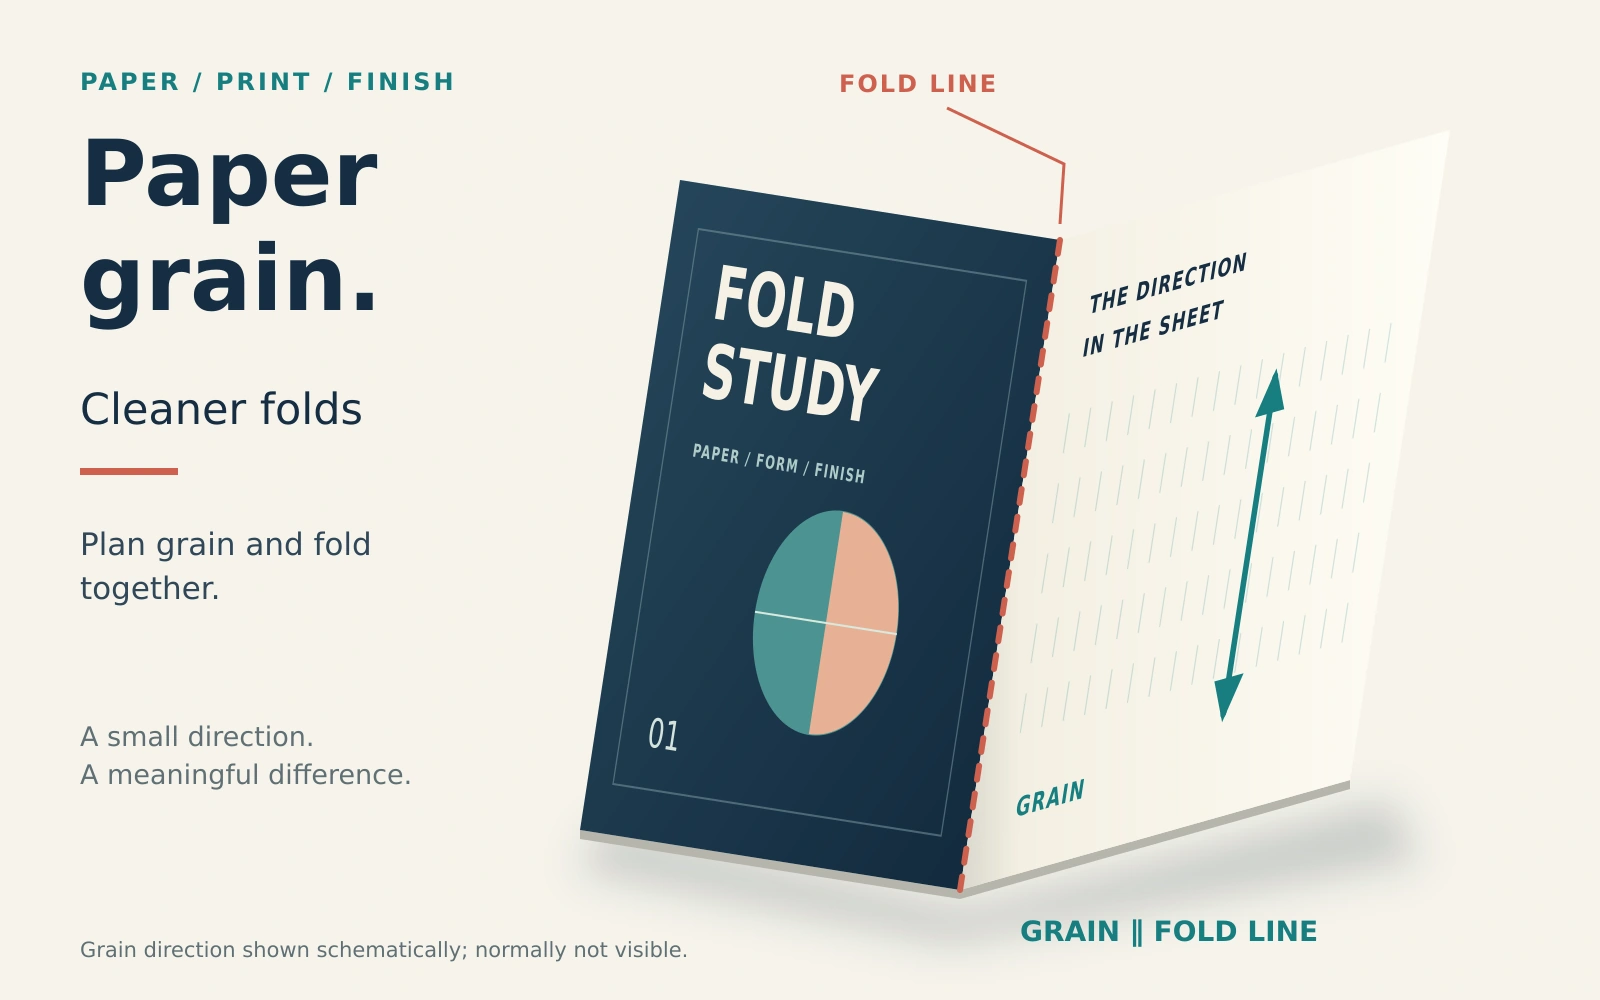
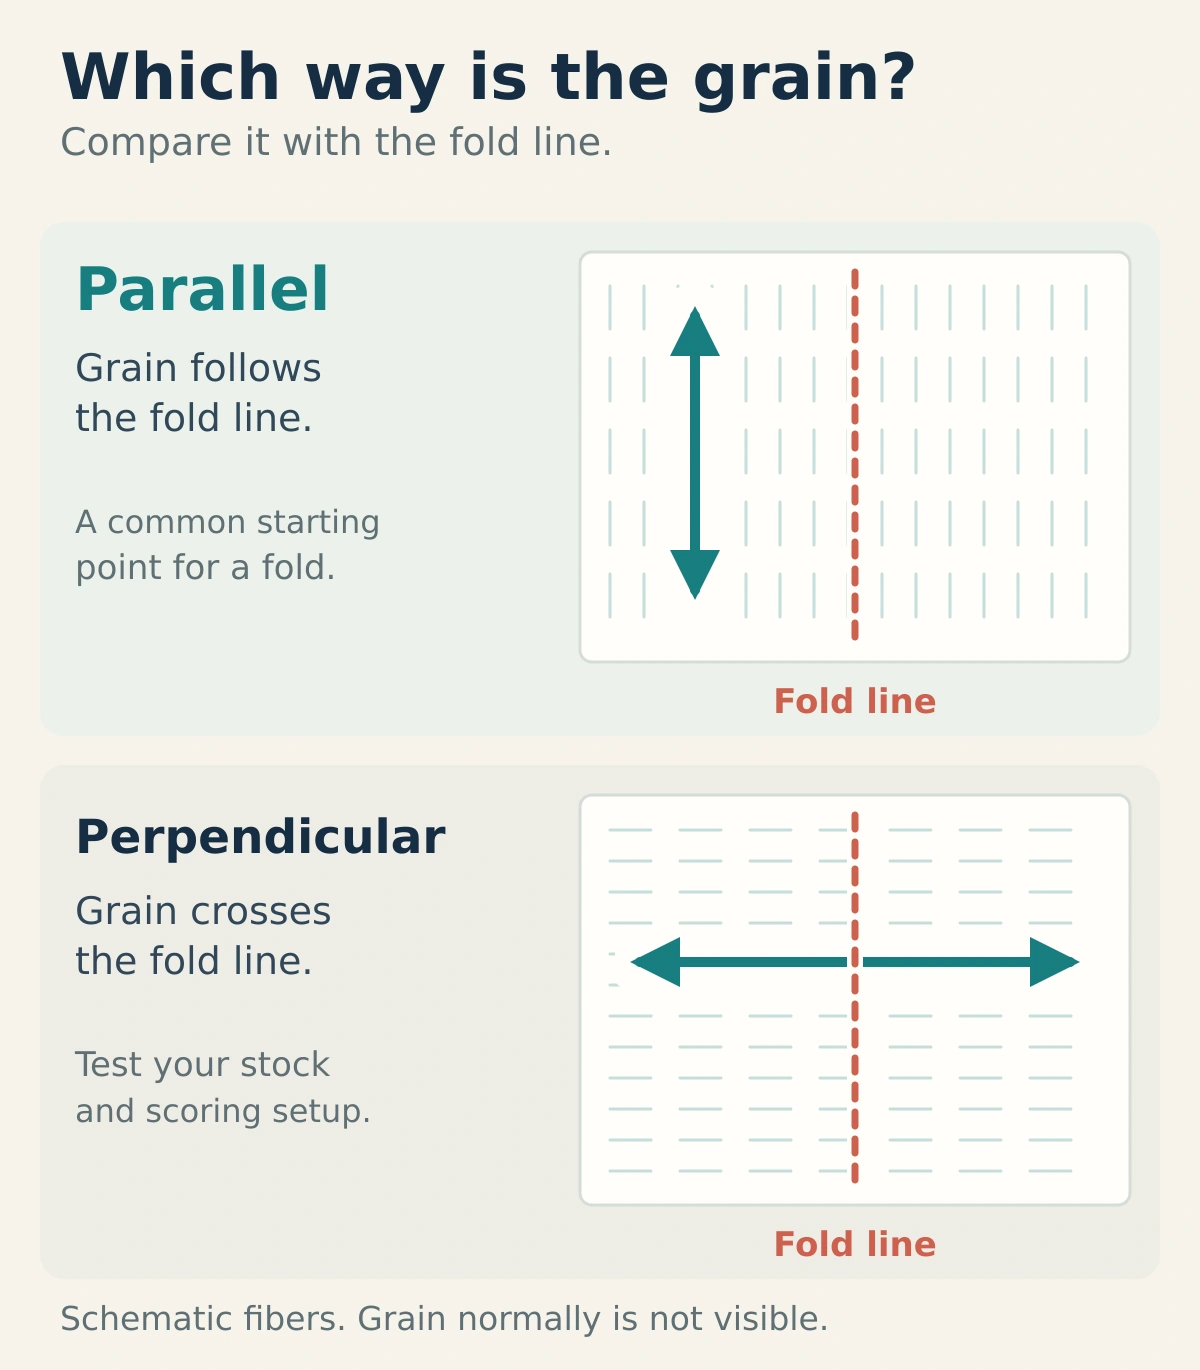
Grain describes the predominant alignment of fibers created during papermaking. Grain long means that alignment follows the sheet’s longer dimension; grain short means it follows the shorter one. These names describe the cut sheet, rather than whether your artwork is portrait or landscape. Mohawk’s Envelope Basics guide explains the distinction.
“Fold with the grain” means the fold line runs parallel to the grain. It does not describe the direction your hand moves while closing the paper. Confirm the supplied stock’s grain with the printer or merchant, and mark an arrow on the planning dummy.
For folded cover work, parallel grain is a sensible starting point, but a successful fold also depends on stock and tooling. Sappi’s Folding and Scoring guide shows that grain direction alone does not determine the result after scoring.
Plan the fold before locking the layout
A simple half-fold brochure
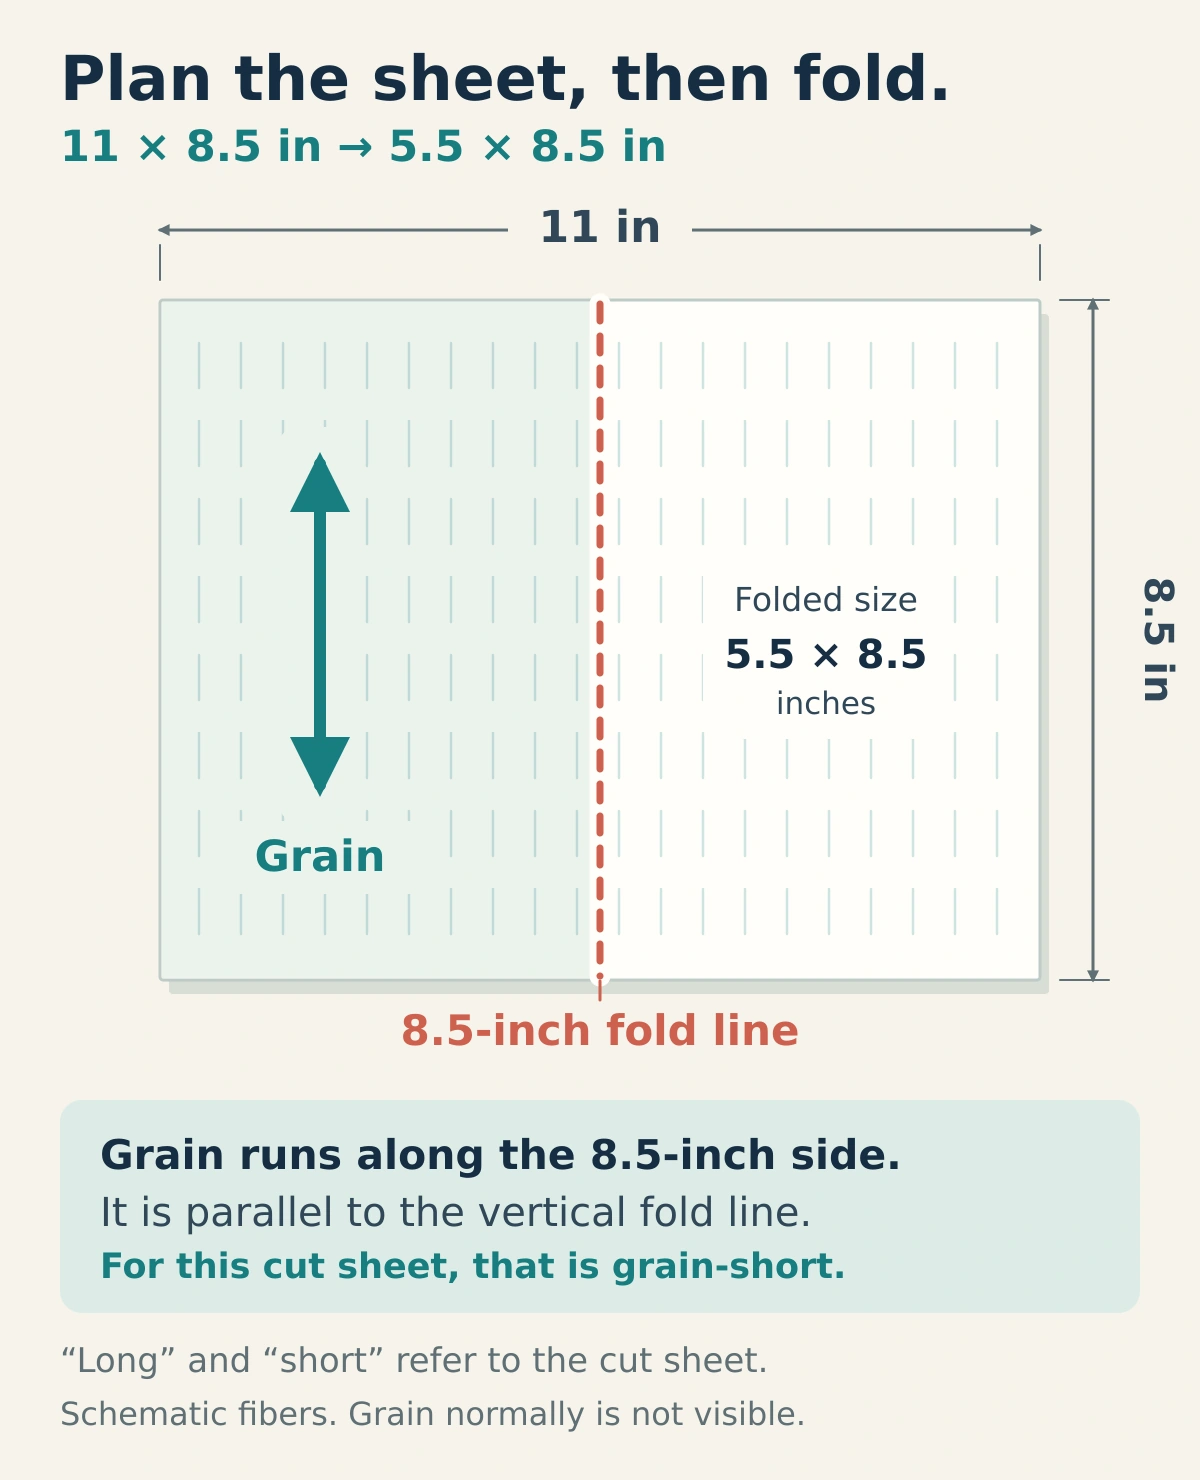
Suppose an 11 × 8.5-inch landscape sheet folds in half to make a 5.5 × 8.5-inch brochure. The central fold is 8.5 inches long. To run parallel to that fold, the grain must follow the 8.5-inch dimension: grain short on the flat sheet.
Write that relationship into the job notes instead of specifying only “letter-size paper.” Ask the printer to confirm that the chosen stock and press-sheet arrangement can deliver it. Turning artwork in the design application does not change the fibers in the paper.
Parallel folds and right-angle folds
A three-panel brochure with two parallel folds can use the same grain direction for both. A piece folded once vertically and once horizontally cannot have both fold lines parallel to one grain direction. Show the finisher the opening sequence and ask which fold needs priority.
Use the printer’s panel template and confirm any tuck-in allowance. Add the approved fold plan to your print-ready artwork checks rather than improvising equal panels or a new press layout at export.
Why coated and digital prints can crack
Folding puts stress on the paper and its surface layers. Coated sheets can be more prone to cracking than uncoated sheets, while heavy coverage and dark solids make fold damage especially troublesome. Dry conditions, heat and excessive folding pressure can also contribute. Sappi’s Fold Endurance technical guidance identifies these interacting causes.
Toner-based digital prints deserve particular attention at the fold; Tech-ni-Fold’s finishing guidance discusses both outer-fold cracking and inside-fold toner flaking. Inspect both sides of a sample. A clean-looking outside does not establish that the inside is sound.
If a dark background crosses a fold, flag it during quoting. A lighter area near the fold may make damage less conspicuous, but changing the design does not resolve a production problem by itself.
Ask what scoring means for this job
Printers sometimes use “scoring” and “creasing” interchangeably. The important question is how the fold is prepared.
A conventional score helps the sheet bend at a chosen line. A channel crease presses the sheet into a matching channel, creating a flexible hinge through controlled separation within its layers. Technifold explains the distinction and why simply weakening a line may be insufficient on heavier stock.
Ask whether the proposed process is suitable for the actual paper, print method and surface finish. The finisher should select the tool, channel width, depth and folding pressure. Paper caliper (thickness), surface finish and equipment all matter; weight alone is not a complete setup specification. There is no useful universal “score deeper” instruction.
For many single-sheet channel-creasing applications, the raised bead belongs inside the finished fold. However, Technifold’s orientation guidance distinguishes these from other scoring and multi-sheet operations. Confirm the tool’s instructions and folding sequence rather than guessing which side faces up.
Approve the fold on the actual materials
Ask how the stock will be stored and acclimated. Follow the paper and equipment guidance rather than applying one waiting period to every job.
A paper dummy checks size and opening order. A production-representative sample checks how the materials behave. Neenah’s folding-board production tips recommend pretesting before full production.
- Record the specification. Include stock, grain direction, flat and folded dimensions, print process and any coating or lamination.
- Make the sample representative. Use the intended stock and production process, including the artwork crossing the folds and the planned finish.
- Inspect the finished piece. Look for white breaks, lifted coating or toner, uneven hinges and panels that bind when closed.
- Resolve changes before approval. Let the printer adjust the material or finishing setup and provide another sample when necessary.
Save the approved sample and job notes for reorders. Include this preparation in the estimate using a finishing-aware quoting workflow. Cleaner folds begin with a shared production plan, followed by evidence from the piece you will actually deliver.